Loading...
# Machine Learning Information and Links
## Important Note
The machine learning cameras use the switch on the side to toggle between training and VS connection modes.
- Switch DOWN for training mode.
- Switch UP for Vision System connection mode.
To test a cam:
Power with 5V and GND from an arduino.
Look on your list of available networks. You should see a network called "WiFiCam_XXX" where XXX are the numbers on your cam (found on a sticker on the back of the camera board).
If not, try removing power, switching the switch, and adding power.
As always, please ask a UTF or LTF for help if you are stuck or having trouble!
## Procedure Summary
Please read the detailed steps for this process [here](https://docs.google.com/document/d/e/2PACX-1vQ62vc19j6C2-0Kt96RCXP47GEOVDUF8kx1D0DLjhxCqnHA-1scFjtmLmQ8KGbFA4QTX7Vno-3M_Wva/pub).
1. Determine the categories you will classify images in to. (In the lesson, this was thumbs up/thumbs down.)
2. Didn't do the lesson/activity in class? Feel free to do the activity yourself (it takes about 20 minutes) [here](https://colab.research.google.com/drive/1oN1PaApCx8lXFLCyGs9ZnhK8Sk2WBDNH?usp=sharing).
3. Gather training images of all categories using a WiFi Cam.
4. Train a model on Google Colab using [this notebook](https://colab.research.google.com/drive/1UgAg3rmqENqiPOPe5mAHOpDjTshxs0hI?usp=sharing&authuser=1).
5. Upload the model. (See model upload below)
6. Connect the WiFi Cam to your Arduino and request predictions from your model!
- If you get a "model not found" error (prediction returns 257), double check that you uploaded the model correctly.
- If you're not seeing your cam on the Vision System, double check that the switch is in the UP position.
## Model Upload
Click [here](https://enes100.umd.edu/tools/modeluploader) to upload a trained model.
## WIFI Cam CAD
Download Cam Case with camera model, best for placing in CAD.
Download Cam Case as STEP file, best for editing/customizing in CAD.
Download Cam Case as STL file, best for 3D printing.
Below is an example of a possible mount to connect the camera. The hole is sized for an M4 screw.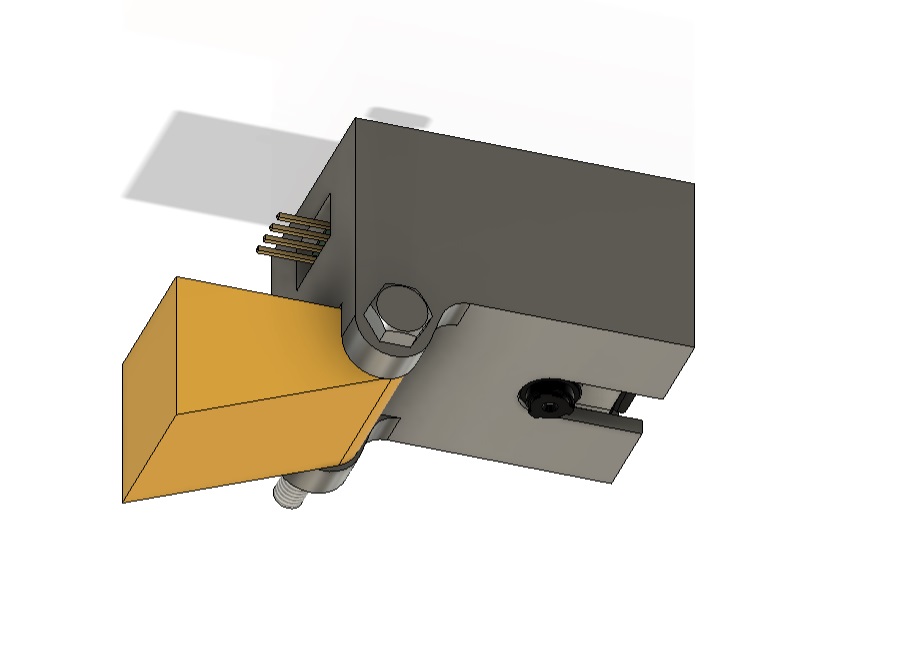
Below is an example of a possible mount to connect the camera. The hole is sized for an M4 screw.